Microscopes allow you to look at very small objects. With this portable microscope, you can see tiny things in great detail. You can explore plants, insects, even the ground can be impressive upon closer inspection!


Before this, I had already worked on projects of inexpensive devices and a couple of months ago, as part of a scientific program, I began work on homemade microscope at home.
The unique features of this microscope are:
- Free design that you can repeat
- Built-in illumination compartment - when you illuminate the microscope, many things become more visible
- It opens up a wide viewing angle so you can easily see the sample being examined.
A note about magnification: The mini microscope has two lenses: one approximately 0.6 cm in diameter (80x magnification), and the second approximately 0.24 cm in diameter (140x magnification). Despite the higher magnification of the second lens, I usually prefer to use the first, because the smaller the lens, the more light it needs, and focusing becomes more difficult and this leads to more difficulties when studying samples. The large field of view of the larger lens makes it easy to use, and the 80x magnification is enough to see all the details invisible to the naked eye.
Read the article to the end and you will learn how to make a children's microscope with your own hands!
Step 1: Gathering materials

Here is a list of materials needed to assemble a pocket microscope. In addition to this list, to make the case you will need a 3D printer (or creativity to make your own case). Apart from the glass beads (lenses), you can probably find everything you need for assembly at home at hand.
I purchased the balls from McMaster:
- 1/4" Borosilicate Glass Ball (8996K25)
- 3/23" Borosilicate Glass Ball (8996K21)
- inch screw 4-40 (M3 screw 25mm long will also work) (90283A115)
- 5mm white LED (like this one)
- CR2032 battery
- Paper clips (like these)
If you're on a budget, you can buy just the glass bead - while the other parts just add functionality, the bead is really all you need to make the microscope work.
Step 2: Print the body


3D printing is the most affordable way to make parts for DIY enthusiasts. I designed the microscope body to be printed on a printer, but it can be made of wood or regular plastic.
The battery protrudes and you may worry about some tension in the battery compartment. Don't worry - you'll remove the excess plastic when you insert the battery. I don't recommend adding supports because they will be difficult to remove.
What if I don't have a 3D printer?
If you are going to make the case in a different way, then I have included a drawing with basic measurements for you. Your dimensions do not have to match mine exactly. Any part of the mechanism that holds the lens is less than 1mm away from the sample you're looking at, and you can move it up and down slightly to focus - it will work.
Files
Step 3: Assembling the Microscope


Once all the parts of the microscope are at hand, you can begin assembly.
Press in the lenses
First, press the lenses into top part housings. The large lens is placed in the large hole, and the small lens is placed in the protruding part of the small hole.
If any of the lenses do not fit tightly, lubricate the edge of the housing with superglue to secure it. If, on the contrary, the lens does not fit into the hole when pressed with your fingers, use a piece of plastic to press it into place.
Twist the two body parts together
Connect the top and bottom of the microscope using a bolt approximately 25mm long. If the body parts are very tight, cut off some plastic. The connection should be secure, but not too tight.
Insert paper clips
The paper clips will keep your samples in place. Insert them into place as shown in the photos.
Insert battery
Take a 2032 battery and insert it into the battery compartment. This will require a little force and you may break off a few pieces of plastic that were filling the gap. Insert the battery as deep as possible.
Insert diode
Carefully insert the diode legs on both sides of the battery. The diode will only light up when connected correctly. If the diode legs are too long, cut them a little. If backlighting is not required, you can insert the LED legs on one side of the battery - the circuit will not be closed and the charge will not be wasted.
Step 4: Prepare a Sample for Study


Next, you should find things that you would like to study under a microscope. You don't have to look too hard - even simple things can look impressive! If you don't find anything, try starting with the torn edge of plain paper. Place the sample under the lens and secure it with paper clips.
Here are some tips for finding good samples to study:
- The thinner the better. If light can't penetrate the sample, it will be more difficult to study.
- If your sample is still thick, look at its edge
- When focusing, look for an easily distinguishable part of your specimen, for example, if you are studying a plant leaf, focus on a vein or some kind of defect.
- Secure small objects between two layers of transparent film
The Pocket Children's Microscope is designed to mount microscope slides in a fixed place, so you don't have to make glass slides (like they do in labs). A "sandwich" made of clear tape will work fine - just be careful of air bubbles that look like something interesting.
Another tip: plant leaves dry out and become deformed, so gluing them to a microscope slide will keep their shape longer.
Step 5: Use a microscope


Show 5 more images


Now you have a working microscope and you can explore the world!
How to use a microscope
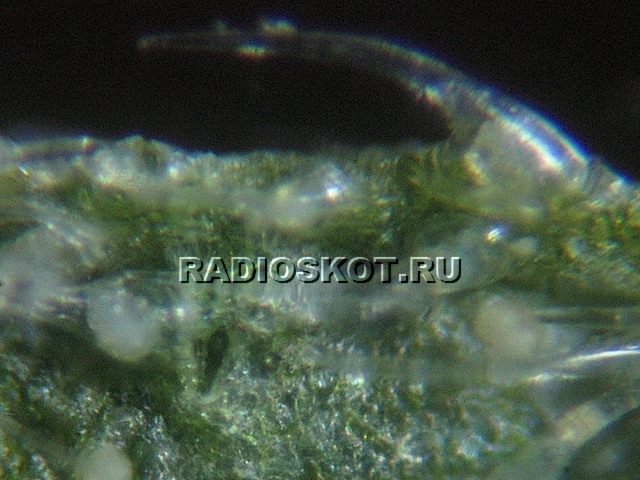
Most in a simple way to start using a microscope will be to simply look through a large lens from a distance at something with a good pattern. I started by looking at the bamboo leaves as they had a lot of different bumps on them.
To focus, move your hand up and down. If you can't, start close to the sample and gradually move away from the microscope until you get it into focus.
Once you understand how to focus and what things look like in focus, hold it up to your eye. The microscope should cover most of your field of view and you will find yourself in a microscopic world!
What you can do with a pocket microscope
Everything looks completely different on a different scale. What is the earth like? Or sand? What about dust? What is the difference between a fresh leaf and a dry one?
Microscopy allows you to answer questions about the world around you through observations. You can even flip the microscope around and just use the lens. Hold it in front of your computer monitor or smartphone and you will see individual pixels and how the different color combinations on the screen are made up of individual red, green and blue pixels. Try holding a camera on top of a microscope and filming what you're studying.
During my school years, I really liked looking at different objects under a microscope. Anything - from the insides of a transistor to various insects. And so, I recently decided to play around with the microscope again, subjecting it to some minor alterations. Here's what came out of it:
Under the microscope - the KS573RF2 microcircuit (ROM with UV erasure). Once upon a time, a test program for the Spectrum was recorded on it.
If you try to solve the problem “head-on” - placing the camera at the eyepiece of a microscope, then nothing good will come of it: it is very difficult to find a point where at least something is visible, the camera is constantly trying to adjust the exposure, the visible area is very small (in the video from this is visible in the first version of the eyepiece). So I decided to go a different route
A little theory
The image that the human eye sees in geometric optics is called a virtual image, and the image that can be projected onto a screen is called a real image.The camera perceives a virtual image, converts it into a real image using a lens, and projects it onto the matrix.
As my experiments have shown, in a microscope everything is the other way around: the image before the eyepiece is real (since by substituting a sheet of paper I saw what was under the microscope), and after the eyepiece it is imaginary (because it is visible to the eye).
Therefore, if you remove the lens from the camera and the eyepiece from the microscope, the image will immediately be projected onto the webcam matrix.
More details about geometric optics -.
From theory to practice
I disassemble the camera:
I remove the lens: 

First test:
To make something last forever, you need to rewind it with blue electrical tape...
I am making a tube that will be inserted into the microscope in place of the eyepiece: 

The tube is a little smaller in diameter than needed, so one end had to be “widened” a little.
I secure the tube with hot glue to the camera without a lens: 


I insert instead of one of the eyepieces: 

Ready! 
Below are a few videos that were shot using this lens:
Fly's eye
eInk screen from PocketBook 301+
Retina screen from iPod
Nokia 6021 screen
CD surface
Do you want to observe, without purchasing a complex microscope? most interesting life the simplest algae and other invisible inhabitants of a drop of stagnant water, penetrate with your gaze into the secrets of plant cells _discern the red blood cells? Do you want to see what the wonderful scales of a butterfly’s wings and the smallest flower pollen look like under high magnification? If you like to do everything yourself, then making a 200-500x microscope will not present any difficulty for you. The microscope is original - without a single glass lens (a regular one has several). Its main optical part is a tin plate with a small hole of 0.3-2.5 mm, into which a drop of water or, better yet, glycerin is placed, held by capillary attraction. If the hole is well processed, the drop takes the shape of a regular, strongly convex lens. Through this single, but very strong “lens”, a transparent or fairly small object is viewed in transmitted light, which is placed at a distance of 0.2-3 mm from the lens, depending on its magnification. The tin plate with drop is held by the top wooden block, which can be raised and lowered with a screw. The block is hinged on the stand. On another, located just below the fixed block, there is a tube glued together from paper, into which another movable tube is inserted, secured with a screw. A round stationary plastic table with a 6-8 mm hole is glued to this tube on top, along which another movable square plastic table moves in two horizontal directions with the help of screws and a spring. A metal bracket prevents it from lifting and jumping off. The hole in this table is made larger. A round plate, also with a wide hole, is glued to the top of the square movable table. A glass slide is placed on it. The diameter of the tables and plates should not exceed 50 mm. To protect the liquid lens from dust and from deformation, it is protected with a piece of clean celluloid film, which is glued to a small plastic washer. For convenience, a round, 30 mm in diameter, eyepiece shield with a hole for the eye is attached to the upper movable block. The shield can be moved to the side when replacing the lens. The object is illuminated from below by a movable mirror through a diaphragm equipped with holes from 2 to 15 mm, providing a significant improvement in image quality if the diaphragm is placed no closer than 100 mm from the object. The central post is fixed motionless in the stand. The object to be examined is placed on glass that does not extend beyond the table. To obtain a good image, it is especially important to carefully process the hole for the drop in the plate, since even a slight irregularity in the hole, an imperceptible blockage or burrs will distort the drop and spoil the image. Therefore, when drilling and processing a hole, its quality must be constantly checked using a strong magnifying glass. To prevent the drop from spreading, the plate is lubricated with Vaseline and then wiped almost dry. The plate and glycerin must be immaculately clean: the smallest debris in the glycerin will settle to the bottom or float to the top of the drop and turn into a foggy spot in the very center of the field of view. For greater magnification, smaller diameter holes must be used. It is better to make a set of plates with holes from 0.3 to 2.5 mm. With skillful handling, the microscope can provide magnification up to 700 times. Every tinkerer can make such a device in a short time from small pieces of wood, plastic, a tin can and a few screws.
"Technology of Youth", 1960, No. 1, Grebennikov V.S.
Here are drawings of a very simple pocket microscope, which is convenient to use on a hike. To make it you will not need any scarce parts, not even lenses. It is replaced by... a drop of water. In a wooden block (40x70x20 mm) you drill (turn) a through hole with a diameter of 8 mm and paint it from the inside with black gouache paint. This is a microscope tube. It must be located exactly relative to the center lines of the bar. Then cut out two disks from tin (from a tin can), one for apertures, the other for lenses. When riveting the diaphragm disk to the bracket, remember: 1) that it should be pressed so tightly against it that there is no side illumination into the tube, and 2) that the center line of the tube should coincide with the holes of the diaphragms. The focusing bar is attached to the block (the base of the microscope) also with strict adherence to the axial alignment of the centers of the lenses with the center of the tube. Be especially careful when making the objective disk: the quality of the microscope’s operation depends on the cleanliness of the holes made. Having marked the disk according to the drawing, punch holes in it and unfold them with an awl. Sharpen the resulting burrs on a whetstone. The holes must be of the correct shape and the required diameter and, most importantly, must have a bevel (chamfer) necessary to form a droplet sphere. The counterbore of the holes is directed outward. The objective disk is attached to the focusing bar with a rivet and washer. Before using the microscope, carefully wipe the objective disk with a cloth, and lightly grease the edges of the holes intended for water lenses with some kind of grease, then the water droplets will not spread. Cut out glass slides (15x70 mm) from photographic plate. Place the object in question between them and slide both glasses into the socket of the bar so that the object in question is opposite the viewing lens. Then, using the pointed end of a match, dial clean water and touch it to both holes of the objective disk. Once in the holes, the drops will take the shape of biconvex lenses. This will give you liquid microscope objectives. Do not allow drops to spread over the surface of the disc. Bring the finished microscope to your eye with a liquid lens and point the tube towards the light source. Rays of light, passing through the hole in the disk and through the object in question, enter the eye. By rotating the bolt, you can move the objective disk closer or further from the subject in question and thereby achieve the best image sharpness. The degree of magnification can be changed if, by turning the objective dial, one or the other lens is installed against the object in question. The best magnification will be obtained by a drop lens placed in a hole of a smaller diameter. The aperture dial makes adjustments easy and gives the subject in question brightness and clarity. In the wind, on hot days, drops of water quickly evaporate, so new drops of water have to be released into the holes from time to time. Water can be replaced with pure glycerin.
S. Vetsrumb
and. Young Technician 1962, No. 8, pp. 74-75.
All of us dreamed of having a microscope as a child. I confess that I was one of these dreamers. A microscope is a very useful thing and will always come in handy, especially if you are a radio amateur, because you can use it to study micro-details mobile phone and computer. And then one day I was given an old pair of binoculars that had been sitting idle on a shelf for several years. Therefore, it was decided to collect something useful from it. There are lenses - so you can make a good microscope from them. To do this, you just need to disassemble and remove the two lenses that are on it. See the photos below. The black tube is 15 centimeters long and it needs to be covered from the inside with aluminum foil, and we do this to obtain maximum illumination inside the tube since our microscope does not have a backlight like in the factory models. The pipe in this case is plastic, but you can also use a piece of water pipe with a diameter of 0.5 inches.
We attach the lenses to the pipe using moment glue and silicone, if you have metal pipe I highly recommend using cold welding. The microscope is ready, now you can look at things that are too small for the ordinary human eye.


I compared the manufactured microscope with an ordinary magnifying glass, the result is that the magnifying glass magnifies it 5 times, and the microscope about 20 times, you can calmly look into the eyes of an ant or look at the mollusks that are hiding under the leaves of trees.

For a microscope, you can make a stand for more professional use and it is better to have several matchbox-sized glasses on hand; glasses are very convenient to use for viewing leaves, insects and various liquids. The stand can be made as follows - take a CD disk and an aluminum wire with a diameter of 3 mm. We twist one end of the wire into a hoop, into which the microscope should freely enter and exit. We also twist the second end in this way and attach it to the center of the disk using silicone, so if we look through a microscope we will see the disk!

It is at this place of the disk that you need to glue a blank sheet of paper with superglue so that the multi-colored rays of the disk do not interfere with viewing, and on the paper you can use glue to firmly glue a rectangular piece of glass. Thus, we have created an almost semi-professional microscope from binoculars, which is indispensable in many matters. Create a device and study everything you can. Good luck - AKA.
Discuss the article MICROSCOPE FROM BINOCULARS
It's no secret that the world around us has subtle structures, the organization and structure of which cannot be discerned by the human eye. The entire universe remained inaccessible and unknown until the microscope was invented.
We all know this device from school. In it we looked at bacteria, living and dead cells, objects and objects that we all see every day. Through a narrow viewing lens, they miraculously turned into models of lattices and membranes, nerve plexuses and blood vessels. At such moments you realize how big and multifaceted this world is.
Recently, microscopes have begun to be made digital. They are much more convenient and efficient, because now you don’t have to look closely at the lens. It is enough to look at the monitor screen, and we see an enlarged digital image of the object in question. Imagine that you can make such a miracle of technology with your own hands from an ordinary webcam. Don't believe me? We invite you to verify this with us.
Necessary resources for making a microscope
Materials:- Perforated plate, corner and brackets for fastening wooden parts;
- A section of profile pipe 15x15 and 20x20 mm;
- Small fragment of glass;
- Webcam;
- LED flashlight;
- M8 bolt with four nuts;
- Screws, nuts.
- Electric drill or screwdriver with a 3-4 mm drill;
- Pliers;
- Phillips screwdriver;
- Hot glue gun.
Assembling a microscope - step-by-step instructions
For the tripod base of the microscope we use perforated plates and metal corners. They are used to join wooden products. They are easily bolted together, and many holes allow this to be done at the required level.Step one - install the base
We cover the flat perforated plate on the back side with soft furniture pads. We simply glue them on the corners of the rectangle.


The next element will be a bracket or corner with versatile shelves. We fasten the short shelf of the bracket and the base plate with a bolt and nut. We tighten them with pliers for reliability.


We mount two small brackets on the edge of the plate on both sides. We attach two more longer corners to them so that we form a small frame. This will be the base for the microscope viewing glass. It can be made from a small piece of thin glass.


Step two - make a tripod
We make a tripod from a piece of square profile pipe 15x15 mm. Its height should be about 200-250 mm. There is no point in doing more, since exceeding the distance from the viewing glass reduces the quality of the image, and less risks being overexposed and incorrect.We attach the tripod to a perforated bracket, and on top of it we place a small piece of 20x20 pipe so that it moves freely along this stand.


We make an open frame from two brackets overlapped with each other. We choose longer bolts so that they are enough to tighten this frame around the moving section of the pipe. We place a plate with two holes on the sides on them and secure it with nuts.


To adjust the distance of the frame from the viewing glass, use an M8x100 mm bolt. We will need two nuts to match the size of the bolt, and two larger size. We take epoxy glue and glue the bolt nuts to the tripod in three places. A nut screwed onto the end of a bolt can also be secured with epoxy.


Step three - making the lens
In place of the tube with an eyepiece in our microscope there will be a regular webcam. The higher the resolution, the better; the connection to a computer can be either wired (USB 2.0, 3.0), or via Wi Fi or Bluetooth.We free the camera from the body by unscrewing the motherboard with the matrix with a screwdriver.


We remove the protective cap and unscrew the lens with lenses and filter. All you need to do is place it in the same place, turning it 180 degrees.


We wrap the junction of the camera lens with the cylindrical body with electrical tape. If desired, it can be additionally glued with a hot glue gun. At this stage, the modified lens can already be tested in action.


Step four - final assembly of the microscope
We assemble the camera in reverse order, placing its body on the tripod frame with hot glue. The lens should be pointed downwards at the viewing glass of the microscope. The wiring harness can be secured with nylon ties to the tripod stand.We adapt a low LED flashlight to the sight glass illuminator. It should fit freely under the microscope viewing panel. We connect the camera to the computer, and after a while the image will appear on the monitor screen.


